|
|
|
Return to main page FIG.1
 The
example of hyperthermia application
The
example of hyperthermia applicationThe given example is interesting in fact that we used not only the electrocoagulation
of tumor masses, but also local super high hyperthermy.
Woman of 72 years entered to the oncologic clinic with the huge decomposed
bleeding tumor of left retroauricular area with the passage to the pinna.
At the level of bleeding exofit the deep electrocoagulation was carried out, whereas deep
tumor infiltrate, invaded to the retroauricular region, underwent superhigh hyperthermy.
The deep heating of whole infiltrate mass was applied by high frequency (2MHz)
electrical current till 70C, exposition time 7 minutes.
If with the treatment of deep tumor infiltration in the retroauricular region
electrocoagulation would be used, then besides the danger of hemorrhage the irreversible injury
of facial nerve undoubtedly would occur. Therefore in this case was used the more kid-glove
method, namely the superhigh hyperthermy, which allowed to preserve facial nerve and ensured
a good cosmetic effect without any asymmetries of the person.
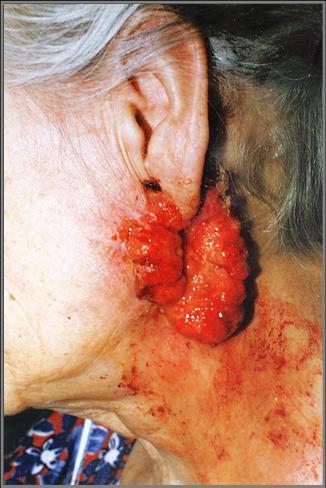
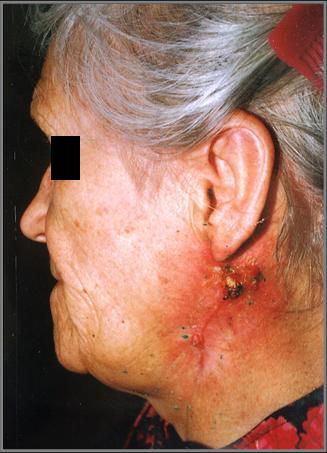
FIG.1
Patient K., 78 y.o., huge decomposed bleeding tumor of left retroauricular
area with the passage to the pinna.
Histological analysis № 993 - adenocarcinoma of left retroauricular region
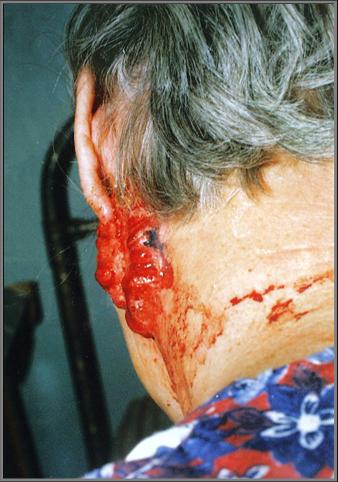
FIG.2 Back view
FIG.3
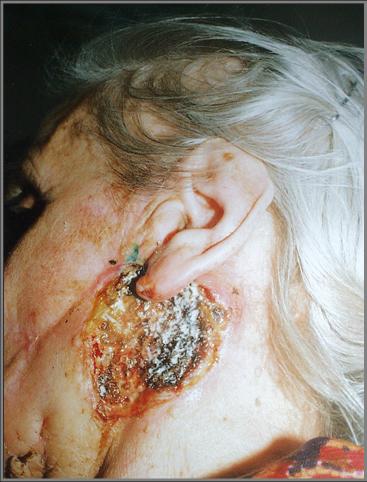
Afterward the sessions of deep electrocoagulation, the charred scab was formed on the spot of
external exofit. Residual tumor tissues still remain in the depth.
FIG.4
rejection of necrotized and the charred exofit’s tissue, afterward the local superhigh hyperthermy is applied at entire depth of residual tumor.
FIG.5
Healing of burned surface.
FIG.5
 Final result: radical convalescence with the good
cosmetic effect
Final result: radical convalescence with the good
cosmetic effect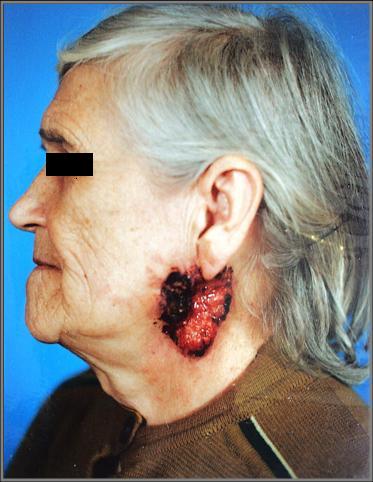
 .
.
FIG.2 FIG.3 FIG.4
FIG.5 FIG.6